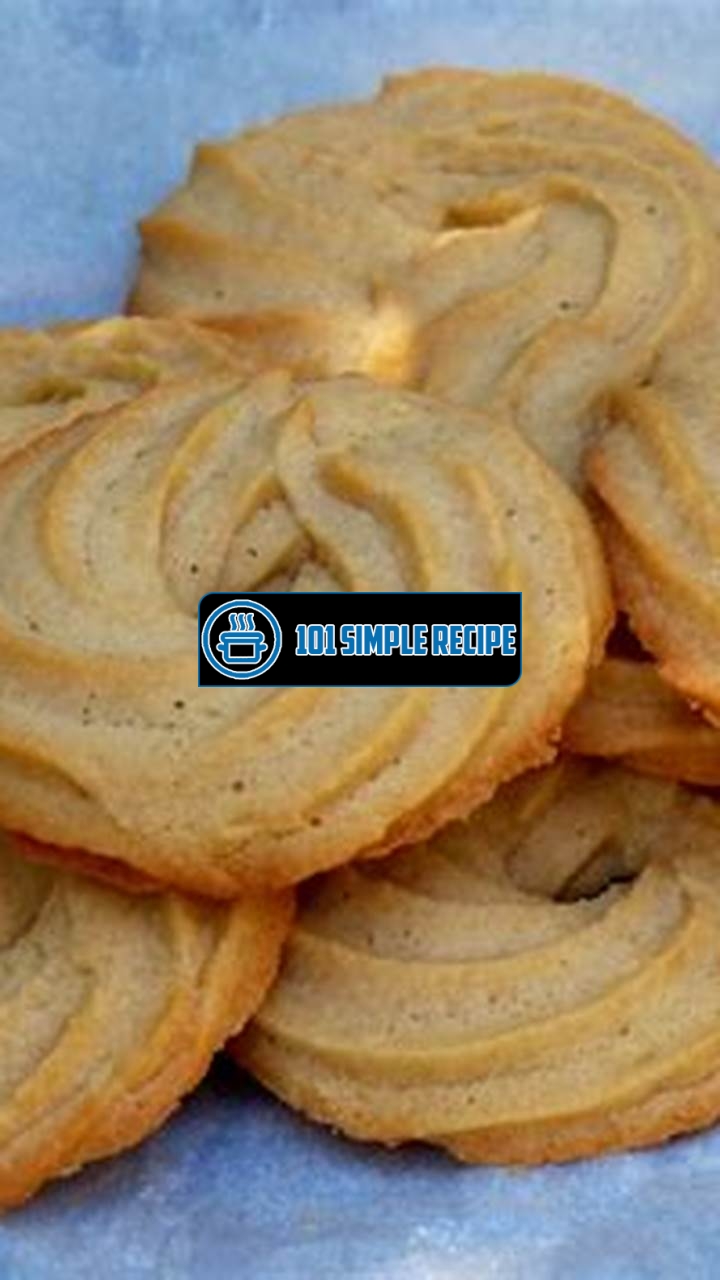
If you’re looking for a delectable and indulgent treat to impress your guests or satisfy your own sweet tooth, look no further than this mouthwatering recipe for Delicious Piped Butter Cookies. These buttery, melt-in-your-mouth cookies are the perfect combination of crispy edges and a soft, tender center. Whether you’re a seasoned baker or just starting out in the kitchen, this recipe is sure to become a staple in your repertoire. And the best part? These cookies can be easily customized with different flavors and decorations to suit any occasion. So grab your apron, preheat your oven, and get ready to embark on a delightful baking adventure!

The History of Piped Butter Cookies
Throughout history, the delightful and indulgent piped butter cookie recipe has been cherished by baking enthusiasts around the world. These delicate treats have a rich history that spans centuries and continents, evolving alongside the art of baking. Let’s explore the origins and evolution of piped butter cookies, from their humble beginnings to the modern variations that have captured our hearts and taste buds.
The Origins of Piped Butter Cookies
The origins of piped butter cookies can be traced back to medieval Europe, where butter was a prized ingredient in baking. During this time, bakers discovered that by combining butter with flour, sugar, and other simple ingredients, they could create a dough that was perfect for shaping and piping.
As baking techniques improved and trade routes expanded, piped butter cookies gained popularity throughout Europe. In France, they became known as “sablés,” named for their sandy texture. Meanwhile, in Germany, these cookies were called “Spritzgebäck,” meaning “pressed cookie dough.” These early variations of piped butter cookies were often shaped using intricate molds or piping bags.
As immigrants brought their baking traditions to new lands, piped butter cookies found their way to America and other parts of the world. With each new generation, the recipe evolved and adapted to local tastes and ingredients. Classic flavors such as vanilla and almond were commonly used, and the cookies were often dusted with sugar or adorned with colorful icing.
Traditional Variations of Piped Butter Cookies
Traditional variations of piped butter cookies reflect the diverse culinary heritage of different regions. In Scandinavian countries like Sweden, piped butter cookies known as “pepparkakor” are spiced with warming flavors like cinnamon, ginger, and cloves. In the United Kingdom, “shortbread” cookies are a beloved variation made with a higher ratio of butter to flour, resulting in a crumbly texture.
Other countries have their own unique twists on traditional piped butter cookies. The delicate “kourambiedes” of Greece are rich with almonds and dusted with powdered sugar. The “mantecados” of Spain are flavored with orange blossom water or anise. Each variation showcases the local ingredients and cultural influences that shape these cherished treats.
Modern Twists on Piped Butter Cookies
In recent years, bakers and pastry chefs around the world have taken the classic piped butter cookie recipe and added their own modern flair. From creative flavor combinations to unique shapes and decorations, there are countless ways to put a contemporary spin on this timeless treat.
Some modern twists incorporate ingredients like chocolate, matcha, or citrus zest to add complexity and depth of flavor. Others experiment with using alternative types of butter or adding unexpected fillings, such as fruit preserves or caramel. Chefs love to experiment with different piping techniques and decorative touches, transforming plain cookies into edible works of art.
Whether you prefer the traditional versions or delight in the modern twists, the piped butter cookie continues to be a cherished treat for indulgent baking. The next time you crave a melt-in-your-mouth cookie experience, don’t hesitate to try your hand at baking these beloved creations.
The Science Behind Piped Butter Cookies
Have you ever wondered why piped butter cookies are so irresistible and delicious? Let’s delve into the scientific principles that make them so special. By understanding the role of butter, the importance of proper mixing techniques, and the impact of oven temperature, you’ll be able to create the perfect batch of piped butter cookies every time.
The Role of Butter in Piped Butter Cookies
Butter plays a crucial role in the texture and flavor of piped butter cookies. Its high fat content adds richness and tenderness to the cookies, creating a melt-in-your-mouth experience. The fat in butter also helps to create a tender crumb by coating the flour particles, preventing the development of gluten. This results in a delicate cookie that practically dissolves on your tongue.
Fun fact: Butter contains milk solids, which contribute to the golden color and delightful aroma of piped butter cookies.
The Importance of Proper Mixing Techniques
Properly mixing the ingredients is key to achieving the perfect texture in piped butter cookies. When creaming the butter and sugar together, it’s essential to beat them until light and fluffy. This incorporates air into the mixture, creating a tender and delicate cookie. Overmixing the dough at subsequent stages can lead to a dense and tough cookie, so it’s important to mix just until the ingredients are combined.
Additionally, when adding the dry ingredients to the butter mixture, it’s important to use a gentle folding motion to prevent overmixing. This helps maintain the desired texture and ensures the cookies maintain their shape when piped.
Tip: Chilling the dough before piping also helps maintain its shape and prevents spreading during baking.
The Impact of Oven Temperature on Piped Butter Cookies
Oven temperature plays a crucial role in determining the final texture and appearance of piped butter cookies. Baking these cookies at too high a temperature can cause them to brown too quickly on the outside while remaining undercooked in the center. On the other hand, baking them at too low a temperature can result in spreading and a lack of crispness.
For perfect piped butter cookies, it’s recommended to preheat your oven to 350°F (175°C). This allows the cookies to bake evenly, with a golden exterior and a soft, tender interior. It’s also important to space the piped cookies properly on the baking sheet, allowing sufficient room for them to spread without merging into each other.
️ Note: Oven temperatures may vary, so keep an eye on your cookies and adjust the baking time accordingly to achieve the desired results.
Mastering the science behind piped butter cookies ensures that you’ll achieve consistently delicious results every time you bake them. By understanding the role of butter, the importance of proper mixing techniques, and the impact of oven temperature, you’ll be well-equipped to create these irresistible treats for indulgent baking adventures.
Mastering the Art of Piping
When it comes to creating beautiful and professional-looking piped butter cookies, mastering the art of piping is essential. With the right techniques and tips, you can achieve perfect results every time. Whether you’re a beginner or an experienced baker, here are some key points to keep in mind.
Choosing the Right Piping Tip
The choice of piping tip can greatly impact the final appearance of your butter cookies. Each tip creates a different design, so it’s important to choose the right one for your desired outcome. Here are a few popular options:
- Open Star Tip: This tip creates a beautiful star-shaped design and adds texture to your cookies. It’s ideal for creating a classic look.
- Closed Star Tip: Similar to the open star tip, this one produces a more defined star shape. It’s perfect for adding a touch of elegance to your cookies.
- Plain Round Tip: The plain round tip is great for creating simple and smooth designs. It’s versatile and can be used to pipe out uniform shapes or to write letters and numbers on your cookies.
Remember, the size of the tip will also determine the size of the piped design, so consider the desired outcome when selecting the tip.
Piping Techniques for Different Designs
Once you’ve chosen the right piping tip, it’s time to learn some techniques for creating different designs. Here are a few popular techniques:
- Outline and Fill: This technique involves outlining the shape of the cookie first and then filling it in with the icing or buttercream. It’s ideal for creating cookies with a vibrant and defined look.
- Swirls and Rosettes: To create beautiful swirls and rosettes, hold the piping bag perpendicular to the cookie surface and apply steady pressure as you pipe in a circular motion. This technique adds a touch of elegance to your cookies.
- Layering: Layering involves piping multiple designs on top of each other to create a more intricate and visually appealing cookie. Start with a base layer and then add additional piped designs on top.
Experiment with different techniques to discover your own unique style and design preferences.
Troubleshooting Common Piping Challenges
Piping butter cookies can sometimes come with its challenges. Here are some common issues that bakers face and how to troubleshoot them:
- Uneven Piping: If you’re experiencing inconsistencies in the piped design, make sure to apply steady and consistent pressure on the piping bag. Practice your technique on a piece of parchment paper before moving on to the cookies.
- Collapsed Designs: If your designs are collapsing or losing their shape, the buttercream or icing you’re using may be too soft. Try refrigerating it for a short while before piping to ensure it holds its form.
- Clogging: If your piping tip gets clogged, it may be due to large particles in your buttercream or icing. Use a mesh strainer to remove any lumps or debris before filling your piping bag.
- Inconsistent Coloring: To achieve vibrant and consistent coloring, make sure to use gel food coloring instead of liquid coloring. Gel coloring is more concentrated and allows for better control over the shade.
By troubleshooting these common challenges, you can overcome any obstacles that may arise during the piping process.
Decorating Piped Butter Cookies
Unleash your creativity with various decorating ideas for beautifully adorned piped butter cookies. Whether you’re baking for a special occasion or simply want to add a touch of charm to your treats, these decorating techniques will take your piped butter cookies to the next level.
Using Colorful Icing and Sprinkles
Add a pop of color and whimsy to your piped butter cookies by using colorful icing and sprinkles. To create a vibrant icing, start with a plain royal icing recipe and divide it into separate bowls. Add a few drops of food coloring to each bowl and mix well until you achieve your desired shades. You can use a piping bag or ziplock bag with a small hole cut at the tip to pipe the colored icing onto the cookies. Get creative and experiment with different shapes and patterns. Once the icing is piped, sprinkle colorful sprinkles or edible glitter over the wet icing. The sprinkles will stick to the icing, adding texture and visual appeal to your cookies. ✨
Creating Intricate Designs with Royal Icing
If you’re up for a more intricate challenge, try creating designs with royal icing on your piped butter cookies. Royal icing is a smooth and glossy icing that dries hard, making it perfect for piping intricate patterns and details. To begin, prepare a batch of royal icing and transfer it to a piping bag fitted with a fine tip. Start by outlining the shape or design you want to create on the cookie. Allow the outline to dry for a few minutes before flooding the inside of the design with more icing. Use a toothpick or a small decorating brush to spread the icing evenly. Once the flooded icing has dried, you can add further details and embellishments using a contrasting colored icing. With a steady hand and some patience, you can create beautiful and professional-looking designs on your butter cookies.
Incorporating Edible Decorations on Piped Butter Cookies
Take your piped butter cookies to the next level by incorporating edible decorations. There are numerous edible decorations available in the market, such as edible pearls, sugar flowers, and edible gold leaf. These decorations can add a touch of elegance and sophistication to your cookies. Apply a small dot of icing onto the cookie surface to act as a glue, then carefully place your chosen edible decoration onto the icing. You can create intricate arrangements or simply add a single focal point to each cookie. The edible decorations not only enhance the visual appeal but also provide delightful surprises when enjoying the cookies.
Note: Remember to let the icing and decorations set completely before serving or packaging the cookies. This will ensure the designs remain intact and the edible decorations remain in place.
With these decorating ideas, your piped butter cookies will become works of art that are as delightful to look at as they are to eat. Get your creative juices flowing and experiment with different techniques and combinations. Your friends and family will be impressed by your baking skills and the stunning presentation of your piped butter cookies. Happy decorating!
Serving and Storage Tips
When it comes to indulgent baking, nothing beats the delightful flavors and buttery texture of piping hot butter cookies. These delectable treats have been a favorite among cookie lovers for generations. Whether you plan to serve them at a party or simply enjoy them as a sweet treat, it’s important to know the best practices for serving, storing, and extending the shelf life of your homemade piped butter cookies.
Presentation Techniques for Serving Piped Butter Cookies
Making your homemade piped butter cookies look visually appealing is just as important as their taste. The presentation can elevate the overall indulgence factor and make them even more irresistible. Here are some presentation techniques that you can use:
- Cookie platter: Arrange your piped butter cookies on a beautiful platter. You can mix and match different shapes and sizes for added visual interest.
- Colorful toppings: Sprinkle colorful toppings such as rainbow sprinkles, powdered sugar, or edible glitter on your cookies to make them more eye-catching.
- Dipping sauces: Serve your piped butter cookies with accompanying dipping sauces like chocolate ganache, caramel, or fruit compote to add an extra layer of flavor and indulgence.
- Garnish with fresh fruits and herbs: Place fresh fruits and herbs such as strawberries, raspberries, mint leaves, or edible flowers around your cookies to create a visually appealing arrangement.
Proper Storage for Longevity
To ensure that your piped butter cookies stay fresh and delicious for as long as possible, proper storage is essential. Follow these tips for optimal longevity:
- Airtight containers: Store your cookies in airtight containers to prevent them from becoming stale or absorbing any unwanted odors from the surroundings. Mason jars or cookie tins work well for this purpose.
- Cool, dry place: Keep your cookies in a cool, dry place away from direct sunlight or heat sources. Exposure to heat and humidity can cause them to lose their crispiness.
- Separate layers with parchment paper: If you need to stack your cookies in the storage container, place a sheet of parchment paper between the layers to prevent them from sticking together.
- Avoid refrigeration: While refrigeration can help extend the shelf life of some baked goods, it is not recommended for piped butter cookies. The moisture in the refrigerator can cause them to become soggy.
Tips for Refreshing Stale Piped Butter Cookies
Even with the best storage practices, there might be times when your piped butter cookies become a bit stale. Don’t worry! You can easily refresh them and bring back their irresistible texture with these simple tips:
- Briefly heat in the oven: Preheat your oven to 350°F (175°C) and place the stale cookies on a baking sheet. Bake them for about 3-5 minutes until they become warm. This will help restore their crispiness.
- Use a slice of bread: Place a slice of fresh bread in the storage container with the stale cookies overnight. The cookies will absorb the moisture from the bread, making them softer and more enjoyable.
- Decorate with a glaze: Prepare a simple glaze using powdered sugar and a small amount of milk or lemon juice. Drizzle the glaze over the stale cookies to add moisture and enhance their flavor.
Remember, the key to enjoying piped butter cookies to the fullest is not only in their deliciousness but also in how you serve, store, and refresh them. With these tips and techniques, you can ensure that every bite of your homemade cookies is a truly indulgent experience.
Thank you for taking the time to read our article on piped butter cookies recipe. We hope you found it informative and inspiring. If you’re craving some delicious homemade cookies, don’t hesitate to try out this recipe. The piped butter cookies are not only tasty but also visually appealing, making them a great addition to any dessert table or gift box. Remember, practice makes perfect, so don’t be discouraged if your first batch doesn’t turn out exactly how you envisioned. Keep experimenting and tweaking the recipe to suit your taste. Stay tuned for more mouthwatering recipes and baking tips. See you next time!
Frequently Asked Questions
Here are some frequently asked questions about piped butter cookies:
| No. | Questions | Answers |
|---|---|---|
| 1. | How long do piped butter cookies last? | Piped butter cookies can last up to 2 weeks when stored in an airtight container at room temperature. Ensure they are fully cooled before storing to prevent moisture buildup. |
| 2. | Can I freeze piped butter cookie dough? | Yes, you can freeze piped butter cookie dough. Simply pipe the desired shapes onto a lined baking sheet, freeze until firm, and then transfer the frozen dough shapes to a freezer bag or container. When you’re ready to bake, simply place the frozen dough shapes onto a baking sheet and bake as directed, adding a few extra minutes to the baking time. This allows you to have freshly baked cookies whenever you want! |
| 3. | Can I add flavors or decorations to piped butter cookies? | Absolutely! Piped butter cookies can be customized with various flavors and decorations. You can add a splash of vanilla extract or other flavorings to the dough, or even mix in some chocolate chips, nuts, or dried fruits. As for decorations, you can use colored sugars, sprinkles, or drizzle melted chocolate over the cooled cookies. Get creative and have fun with it! |
| 4. | Can I use a different piping tip? | Of course! While the recipe recommends using a star piping tip for a traditional butter cookie shape, you can experiment with different tips to create various designs. Try using a round tip for simple dots, a petal tip for flower shapes, or a leaf tip for leaf designs. The sky’s the limit, so feel free to let your creativity shine! |
| 5. | Can I use margarine instead of butter? | While butter is recommended for the best flavor and texture, you can use margarine as a substitute. Keep in mind that the cookies may have a slightly different taste and texture when using margarine. It’s always best to use high-quality butter for the best results. |
| 6. | Can I add food coloring to the dough? | Yes, you can add food coloring to the dough to create vibrant, colored cookies. Simply add a few drops of food coloring to the dough and mix until evenly distributed. Gel food coloring works best as it is concentrated and won’t affect the dough consistency. Remember to start with a small amount of food coloring and gradually add more until you achieve the desired color. |
Piped Butter Cookies Recipe
Here is the recipe for piping delicious butter cookies:
Jump to Recipe
Piped Butter Cookies

Try this delicious recipe for piped butter cookies that are buttery, crisp, and beautifully piped. Perfect for any occasion!
- 1 cup unsalted butter (softened)
- 3/4 cup powdered sugar
- 2 egg yolks
- 1 tsp vanilla extract
- 2 1/4 cups all-purpose flour
- 1/4 tsp salt
- In a large bowl, cream together the softened butter and powdered sugar using an electric mixer on medium speed until light and fluffy.
- Add the egg yolks and vanilla extract to the butter mixture. Beat until well combined.
- In a separate bowl, whisk together the all-purpose flour and salt. Gradually add the dry ingredients to the butter mixture, mixing on low speed just until incorporated.
- Transfer the cookie dough to a piping bag fitted with a star tip.
- Preheat the oven to 350°F (175°C). Line a baking sheet with parchment paper.
- Pipe the dough into desired shapes onto the prepared baking sheet, spacing them about 1 inch apart.
- Bake for 10-12 minutes, or until the edges of the cookies are lightly golden brown.
- Allow the cookies to cool on the baking sheet for 5 minutes, then transfer them to a wire rack to cool completely.
- Enjoy the delicious piped butter cookies!


